1.Chrome插件开发基础
开发Chrome插件很简单,只要会基本的前台技术HTML、CSS、JS就可以开发了。
Chrome插件一般包括两个HTML页面background和popup。
background页面只在启动浏览器加载插件时载入一次,它不直接显示出来而是在后台运行。
它包含了插件的主要逻辑,收集或处理的结果可以保存到全局变量localStorage中传递给popup
页面。popup页面就是点击插件图标后弹出的页面,将用户需要的数据展示出来或者与用户交互。
此外插件还应该包含有CSS和JS文件以及一些图片文件。插件的相关配置都保存到一个叫做
manifest.json的文件中,里面的配置是以JSON数据格式保存的。
本文这个天气预报插件的源代码结构如下:
myplugin
|--bg.html
|--popup.html
|--manifest.json
|--img
| |--icon.png
|--js
| |--jquery-1.7.2.min.js
|--style
|--popup.css
2.实时获得天气预报信息
首先通过http://61.4.185.48:81/g/获得城市编号。注意,这个URL返回的是一个JS脚本,
其中变量id保存的是城市编号。之后通过http://m.weather.com.cn/data/[id].html获得
城市天气预报。这个URL返回的是JSON数据格式,如下:
{
"weatherinfo":
{
"city":"北京",
"city_en":"beijing",
"date_y":"2012年5月6日",
"date":"",
"week":"星期日",
"fchh":"08",
"cityid":"101010100",
"temp1":"31℃~19℃",
"temp2":"28℃~19℃",
"temp3":"29℃~18℃",
"temp4":"27℃~18℃",
"temp5":"23℃~14℃",
"temp6":"25℃~15℃",
"weather1":"晴转多云",
"weather2":"阴",
"weather3":"多云",
"weather4":"多云",
"weather5":"多云转阴",
"weather6":"阵雨转多云",
"img1":"0",
"img2":"1",
"img3":"2",
"img4":"99",
"img5":"1",
"img6":"99",
"img7":"1",
"img8":"99",
"img9":"1",
"img10":"2",
"img11":"3",
"img12":"1",
...
}
}
我们在bg.html中定时地获得到城市的天气信息,保存到全局变量localStorage中。
之后用户点击插件按钮时就可以通过popup.html看到实时的天气情况了。
3.jQuery基础
jQuery功能很多很强大,本文例子中主要用jQuery来简化Ajax调用,如getScript和get函数,
以及parseJSON函数将JSON字符串解析成JS对象,另外就是$("#id")对DOM对象的访问。
4.代码实现
具体实现起来还要注意几点:
一是localStorage不能直接保存解析好的JSON对象,因此bg.html要将字符串保存localStorage
中,popup.html自己解析后显示到页面上。
二是要在manifest.json中将天气网站配置到permission中,才可以在bg.html中跨域访问它。
manifest.json
{
"name": "My First Extension",
"version": "1.0",
"description": "The first extension that I made",
"permissions": ["tabs", "notifications","http://m.weather.com.cn/*"],
"background_page": "bg.html",
"browser_action": {
"default_icon": "img/icon.png",
"default_popup": "popup.html"
}
}
bg.html
<html>
<head>
     <meta charset="UTF-8">
     <title>weather</title>
     <script type="text/javascript" src="js/jquery-1.7.2.min.js"></script>
     <script type="text/javascript">
     function init() {
          //$id = "101070201";//此处是大连的城市ID,可以去weather.com.cn找到对应的weather city ID
          //$url = "http://m.weather.com.cn/data/" + $id + ".html";//接口URL

          // 利用下载服务器端脚本来间接解决跨域访问问题
          $.getScript(
               'http://61.4.185.48:81/g/',
               function(){
                    $.get("http://m.weather.com.cn/data/" + id + ".html",
                         function(data) {
                              window.localStorage.weather = data;
                         }
                    );
               }
          );
     }
     window.setInterval("init()", 5*60*1000);
     </script>

</head>
<body>

</body>
</html>
popup.html
<html>
<head>
     <meta charset="GB2312">
     <title>weather</title>
     <link rel="stylesheet" type="text/css" href="style/popup.css"/>
     <script type="text/javascript" src="js/jquery-1.7.2.min.js"></script>
     <script type="text/javascript">
     function init() {
          var data = $.parseJSON(localStorage.weather);
          var weatherinfo = data["weatherinfo"];
          var datearray = ["", weatherinfo["date_y"], "第二天", "第三天", "第四天", "第五天", "第六天"];
          $("#cityname").html(weatherinfo["city"] + "城市天气预报");
          for (i = 1; i <= 6; i++) {
               var divid = "#div" + i;
               $(divid).append(datearray[i]).append("<br>");
               var imgurl = "http://m.weather.com.cn/weather_img/" + weatherinfo["img"+(i*2-1)] + ".gif";
               $(divid).append('<img src="' + imgurl + '"/>').append("<br>");
               $(divid).append(weatherinfo["temp" + i]).append("<br>");
               $(divid).append(weatherinfo["weather" + i]);
          }
     }
     </script>
</head>
<body onload="init()">
     <div id="cityname"></div>
     <hr></hr>
     <div id="div1" class="weatherdiv"></div>
     <div id="div2" class="weatherdiv"></div>
     <div id="div3" class="weatherdiv"></div>
     <div id="div4" class="weatherdiv"></div>
     <div id="div5" class="weatherdiv"></div>
     <div id="div6" class="weatherdiv"></div>
</body>
</html>
popup.css
html {
     height: 180px;
     width: 700px;
}

#cityname {
     text-align: center;
     font-size: 20px;
     font-weight: bold;
     margin: 5px;
}

.weatherdiv {
     float: left;
     width: 15%;
     margin: 5px;
}
5.调试\打包\安装
关于Chrome浏览器下开发的调试:
普通页面的调试:用console.log(obj);打印任意JS对象。之后在工具->JavaScript控制台进行调试。
插件开发的调试:打开活动视图bg.html。修改后,可以点击“重新载入”重新加载我们的插件。

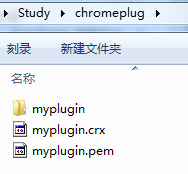
在Chrome浏览器中,选择工具->扩展程序->开发模式->打包扩展程序
选择插件的根目录,打包后会产生压缩安装包crx和密钥文件pem。
安装方法很简单,直接把crx文件拖到chrome浏览器窗口里就可以了。
6.最终效果图
分享到:


相关推荐
chrome设置编码插件: chrome://extensions/
X-Forwarded-For Header插件,此扩展允许您快速设置X-Forwarded-For HTTP标头
chrome插件:Xdebug helper 1.6.1
一个 Chrome 插件:将 Google CDN 替换为国内的.zip
ReplaceGoogleCDN, 一个 Chrome 插件:将 Google CDN 替换为国内的。
chrome插件XSwitch chrome插件XSwitch
Adblock Plus是Chrome浏览器中非常流行的一款广告拦截插件,Adblock Plus的用户多达数百万之多,在全球范围内都有很高的使用评价 最新版chrome浏览器安装Chrome插件时出现"CRX-HEADER-INVALID"解决方法 1. 打开...
其实要做一个在广告加载前就将其删掉的插件也是可以的,但是那样会增加开发期的麻烦,所以懒得去做。反正我的网络挺快的,几乎看不到广告出现。而且那种插件会令CSDN损失广告收入,就算作出来也不能发表在CSDN上。
“京东佣金助手”,可以方便用户在浏览京东商品的实现显示推广的佣金金额,佣金比例。
实际开发工作中经常用到json数据,那么就会有这样一个需求:在谷歌浏览器中访问URL地址返回的json数据能否按照json格式展现出来。 比如,在谷歌浏览器中访问:http://jsonview.com/example.json 避免翻装插件好方法...
这是一个开源的、基于jQuery 函数库的 JavaScript 天气预报脚本插件。 代码语法完全符合W3C网页标准,完全兼容各种主流浏览器。 本插件主要用于天气预报的展示。 浏览器兼容: Internet Explorer 6 /7 /8 /9 Fire...
ChromeExtensionDocument:chrome插件中文开发文档.zip
Chrome 插件伴侣 是一款可以让你不通过 Chrome 应用商店,直接安装 Chrome 扩展的 Windows应用。 Chrome 目前并不支持传统的拖拽方式安装扩展,是为了安全。而在 67 版本之前是可以随意安装的。 于是安装 Chrome...
很好用的chrome 插件合集,不要错过--chrome插件合集.rar
第一步:把下载后的.crx扩展名的离线Chrome插件的文件扩展名改成.zip或者.rar(如果看不到Chrome插件的扩展名请百度搜索相关操作系统的设置方法,这里不再叙述)第二步:右键点击该文件,并使用压缩软件(如winrar、...
阿里mPaaS日志的分析工具,Chrome浏览器的插件。
chrome必备的插件,轻松安装,只需拖到chrome://extensions/
Chrome浏览器插件:ResourcesSaverExt实现sources资源批量下载 Chrome插件0.1.8:Save All Resources
最好的一个前端的网站导航插件,可检索,可搜索。希望帮助大家在学习上有一些便利。 使用方法: 1,叉或星星 ; 2,下载此项目或者git clone 3,进入chrome浏览器的扩展程序页面(你也可以打开chrome浏览器,在...
这是在自动登录的chrome插件,主要利用javascipt来完成,这里以淘宝网为例子,希望对大家有所启发。